
AeroPress vs Moka Pot: Which One is Better?
In the world of coffee, there are many different ways to brew a cup. There is the drip method, percolation, and even French press brewing. But perhaps one of the most interesting methods is that of using an AeroPress vs Moka Pot for fresh brewed coffee. Although both have their pros and cons, I believe that in this case it just comes down to personal preference when deciding which one you might want to use! So what exactly sets these two devices apart? Let’s take a look at some key differences between them so you can decide which way works best for your morning cup o’ joe!
The AeroPress is a device that makes an excellent cup of coffee. The AeroPress is easy to use and it’s equally easy to clean up. With the ability to brew both American style or espresso, the Aeropress can be used for more than just one type of drink. However, there are alternatives out there like the Moka Pot which also produces great tasting coffee in minutes! So which do you think is better? Keep reading below find out!
Table of Contents
What is AeroPress?
AeroPress is a device for brewing coffee. The device works by using air pressure to force the water through the ground coffee and into an awaiting cup. That’s all there is to it, really.
At first glance, creating such a contraption sounds pretty simple, and it would be if not for one key factor: air pressure. To use the AeroPress you need 24 full bars of pressure (24 bar or PSI), and it takes about 90 seconds for this level of pressure to develop naturally in your household water pipe system. With this knowledge we can deduce that if you are looking to make AeroPress at home, you will need either bottled water or a pressurized pot. This might seem like a hassle, but when you look at how well it works and the quality of coffee it produces, all this effort is totally worth it.
AeroPress Brewing Instructions
#1. Wet the rubber stopper on top of the chamber and insert the filter cap with attached paper filter inside (if using reusable metal or permanent filters, skip this paper filter step).
#2. To make 1 cup of coffee, measure out 7 tablespoons (50 grams or slightly less than 2 ounces) of AeroPress ground coffee. Use more for a stronger brew and less for a milder flavor. Place the coffee in the chamber, then shake down until all grounds are level with the number “2” on the side of the chamber.
#3. Slowly add enough hot water to saturate all the grounds evenly–this is about 6-7 ounces per cup of coffee you will be making. If you don’t have enough it will leave some dry pockets, so aim to use at least 6 ounces if you can – I never go wrong with an extra ounce or two! This amount of water will vary depending on altitude, so if you are not near sea level then check the instructions that came with your AeroPress for information about how much water to use.
#4. Stir vigorously for 5 seconds or until dissolved coffee is evenly dispersed throughout the water. Do not put lid back on yet!
#5. Insert plunger into chamber all the way up to rubber stopper, but don’t plunge just yet.
#6. Place your cup or carafe underneath the filter cap and start a timer- brewing time should be 1 minute. Once it hits 60 seconds begin pressing slowly down on plunger until you hear air escaping from the chamber (make sure you look first to ensure proper placement of brew cap). Your AeroPress coffee will now be filtering through the cap, ready to be served.
#7. Remove filter cap and discard used grounds. Rinse AeroPress with hot water as needed and wipe dry with a towel (this step is important for keeping your AeroPress in top shape).
#8. Serve coffee immediately or pour into an insulated container such as a thermos if you will not drink it all right away. The 1-cup capacity makes about enough for 1 large mug or 2 small cups of coffee – double it if you want more than that!
Pros And Cons Of AeroPress
AeroPress vs Moka Pot – The AeroPress (often known by its brand name Aerobie) is an unusual one-piece syringe style coffee maker that uses air pressure to extract the flavour. This article will be looking at some of the pros and cons of using an AeroPress, as well as detailing why it’s best not to use boiling but rather slightly hotter water (around 95 degrees Celsius).
What are the pros of an AeroPress?
There are numerous different reasons why people like this device, including:
– It has a great taste
We should always remember that no matter how cool or fancy your coffee maker is you can never create good flavours unless you start with good beans. Using freshly roasted beans in the proper press will mean that you’ll get a taste that has been described as “that of a French Press but more intense and less sour” (Serious Eats).
– It’s easy to clean
With most coffee makers one thing you have to look out for is how easy they are to clean, especially if you’re making coffee in your office. There’s nothing worse than having clunky machinery with all sorts of tubing and weird flow patterns so the great thing about the AeroPress is that it has just three pieces which are easily removable/cleanable.
– It doesn’t take up much space
I think this explains itself really well, one of the best things about this device is that it takes up very little counter space, meaning there no need for an excessive amount of storage.
– It has its own paper filters
This is a great touch, no more worrying about having to purchase paper filters or running out of them when you need them most!
– It’s affordable
I know some people might find this an odd thing to say but let’s face it, the AeroPress comes in at $30 for starter kit (which includes 350 paper filters). You can get other coffee makers for this price but they won’t be as good! And you can also buy alternatives if you’re not convinced by what Aerobie are offering.
What are the cons of an AeroPress?
There aren’t that many major or noticeable problems with using an AeroPress or things put people off, these include:
– It takes a little while to learn how to use it
I know that some people might see this as a bonus, but if you’re in a rush or working then it’s going to be irritating.
– Cleaning can be annoying
The price of convenience is sometimes tedious cleaning, so take note! In particular avoid the temptation of using soap/detergent or any other cleaning product which will affect the taste of your coffee.
– Using boiling water damages the flavour
This is an argument from personal experience and one that I’ve heard others talk about too. Whilst it’s true that you should not boil the water if you want to get good results this doesn’t mean that you have to use just below boiling water either. The actual problem is that the water becomes overly thick, which tends to muddy up the flavour of your coffee. So if you want to get good results then avoid boiling water but do use hotter water instead.
– It’s not best for group situations
If you’re looking at getting an AeroPress it might be worth bearing in mind that this device isn’t quite as good when used with other people (or even by more than one person). This is because it doesn’t make a lot of coffee and also because there are numerous reports about how messy it can be (each cup has to be made individually).
Overall I would say that there are far more pros than cons associated with using an AeroPress, especially given its price point! This is a device that will last years and produce fantastic coffee every time so it’s well worth the investment!
Moka Pot
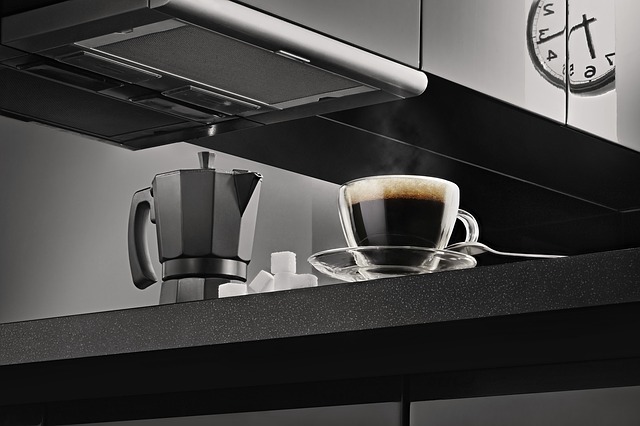
AeroPress vs Moka Pot – The moka pot, also known as stove top espresso maker, is a simple type of coffee maker. It was invented by Luigi di Ponti for Alfonso Bialetti in 1933 and produces coffee by passing boiling water pressurized by steam through ground coffee. It is very popular all over the world due to its ability to make rich and delicious cups of coffee at a relatively low price. The Moka Pot consists of three main parts: Chamber, Filter Basket and Lid/Extraction Knob.
Moka Pot Parts
Chamber
The chamber is the bottom portion which holds the grounds and where the water boils. This section has a single or double tapering tube which extends upwards to the top part where it joins with the filter basket.
Filter Basket
The middle section which holds the coffee grounds and sits on top of the chamber. It has an inlet tube which penetrates through its center for water to flow through during extraction process. A second, smaller tube called jet runs vertically up from just below the chamber’s edge to just above its center, giving the brewed coffee a clear passage up into the upper chamber after passing through the grounds. This tube also provides air space between two layers of grounds-helps provide necessary pressure for brewing; without it, there is not enough pressure (steam) generated by boiling water to push liquid up this tube.
Chamber Packing & Extraction Procedure:
Packing the chamber with coffee for a single serving-place one rounded, heaping tablespoon of finely ground coffee per cup into the filter basket. Level off grounds with a small knife or spatula.
Pouring in boiled water until it reaches just below jet tube. Place lid/extraction knob onto now packed coffee chamber and place on stove over medium heat to bring up pressure and steam. Once you see bubbles forming, immediately reduce heat to low as not to burn your coffee. Maintain this lower flame so as to allow brewed coffee to form gradually from bottom of pot, about 10 minutes or slightly more depending on pot used.
After that time turn off burner and remove moka pot from stove allowing it to cool down a little before serving.
Brewing Moka pot with single/double tapering tube
– There are two types of moka pots on the market, one with a single tapering tube and the other with a double or twin tapering tubes. The single/twin coiled tubing is designed to let water pass straight up through the center of your coffee grounds while providing air space between them.
For brewing more than cup at a time for example for 3 cups place another empty chamber on top of previously brewed chamber, make sure it fits properly before replacing lid extraction knob . Bubbling should start about 5 minutes after switching heat on again, allowing contents to heat up gradually until all pressure is released from upper chamber into bottom chamber containing fresh coffee which will then be ready to serve.
For brewing one more cup, place another empty chamber on top of previously brewed chamber and so on.
Brewing Procedure with Double Tapering Tube
Place spoonfuls of coffee as for a single serving into the filter basket.
Pour boiled water up to jet tube as usual but do not screw lid down tightly; rather leave it slightly loose before placing pot over heat source again.
As the pressure begins to build, you will hear a loud gurgling noise and water will increase in volume (you may need to raise burner heat slightly). Keep an eye out that your flame doesn’t burn your coffee! If this happens, turn off heat immediately and let pot sit until all bubbling has ceased before continuing.
When all the water has finished passing through and your coffee is ready, remove pot from heat and serve.
Extraction Procedure: for 3 cups of coffee
Brewing Procedure: with double tapering tube: Place one spoonfuls of coffee into filter basket and pour in boiled water up to jet tube as usual but do not screw lid down tightly; rather leave it slightly loose before placing pot over heat source again.
As the pressure begins to build, you will hear a loud gurgling noise and water will increase in volume (you may need to raise burner heat slightly). Keep an eye out that your flame doesn’t burn your coffee! If this happens, turn off heat immediately and let pot sit until all bubbling has ceased before continuing.
When all the water has finished passing through and your coffee is ready, remove pot from heat and serve.
For Brewing one more cup of coffee, place another empty chamber on top of previously brewed chamber and so on.
Pros And Cons Of Moka Pot
Pros Of Moka Pot
– Cost effective
A Moka Pot costs a fraction of a Keurig, and the average coffee-drinker will replace their K-Cups many times over before having to replace their Moka Pot. This is because it can make several cups at once, rather than only one cup every few minutes.
– A Good Brew
Despite its small size, the Moka Pot brews a much richer and stronger taste than most other single cup brewing methods. In part, that’s because the boiling water isn’t forced through the grounds, but instead seeps through them from all angles under pressure from steam being generated in the lower chamber. The result is similar to drip coffee.
– Brewing Time
Most brewers take between 3-5 minutes to brew a cup, which is just enough time to take off your morning coat and put on your reading glasses.
– No Pods
The Moka Pot doesn’t require any special non-biodegradable pods to make coffee, which means it’s much more environmentally friendly than other single-serve brewers. It also helps you avoid K-Cup Pods if you find them wasteful or not flavorful enough.
– No Electricity Requirement
While some automated brewers do draw power from their rechargeable batteries, the Moka Pot requires no electricity whatsoever for use. This makes it perfect for camping trips or for surviving the Zombie Apocalypse*. There will be plenty of coffee made before that day comes though! You’ll never have to worry about your power dying in the middle of a cup!
Cons Of Moka Pot
– Coffee grinds can be absorbed by the filter. If this happens, it will add a “dirty sock” taste to your drink and reduce the pot’s life-span.
– It requires that the coffee has been ground particularly fine for espresso. If you have an espresso machine, this is probably not a problem.
– Brewing takes anywhere from 4 to 10 minutes depending on the factors above and how often it is used.
– Because all its parts are made of metal, it can be prone to rust if it is not cleaned correctly (daily).
Comparison: AeroPress vs Moka Pot
Aeropress is a very popular home brewing tool for coffee. It was invented by Alan Adler during the year 2005. The AeroPress uses air pressure to extract coffee instead of the traditional method of infusion/drip which are used in most coffee makers.
The Moka Pot is another type of brewer used for making coffee at home, but it’s more like an espresso maker than a drip maker. It has two chambers: one where water is poured and heated up, and the other where the brewed coffee collects in a filter system with holes in it (like a giant French press).
AeroPress vs Moka Pot – Similarities:
– Both devices use pressure to extract flavor from ground beans into water that is added afterwards; the beans steep in the water, not unlike how tea is brewed with a teabag.
– Both are useful for making coffee at home, as opposed to having to shell out extra money at expensive cafes or breakfast joints.
AeroPress vs Moka Pot – Differences:
– The AeroPress uses air pressure to extract the flavor from beans which is then added with hot water afterwards. This process is known as “aeropressing”. On the other hand, an Moka Pot uses heat and steam pressure to extract flavor from ground beans directly into the collecting chamber with holes in it where the brewed coffee will collect. It’s more like an espresso maker than most drip producers because most drip makers only brew one cup of coffee at a time compared to Moka pots which produce up to three cups (depending on the model) of coffee at a time.
– Moka Pot is much easier to clean since it only has one chamber that needs to be disassembled and cleaned; the leftover ground beans can just be dumped into your compost bin/trash can. On the other hand, during cleaning, you could get splashed with very hot water which could burn your hands if you’re not careful enough.
– An AeroPress is made from plastic while a Moka Pot is made from aluminum. In terms of durability, an AeroPress will most likely last longer since metal breaks more easily than plastic according to Newton’s 3rd Law of Motion: “For every action, there is an equal and opposite reaction”.
AeroPress vs Moka Pot – To summarize, an AeroPress is easier to clean, less expensive because it’s made from plastic and hence has a lower cost for manufacture and replacement parts. On the other hand, a Moka Pot is slightly more durable than an AeroPress since metal doesn’t break easily compared to plastic.
How Long Should A Moka Pot Take?
Many people who are new to using a Moka Pot wonder how long does it take for the coffee to be brewed. The answer is that it takes between three and ten minutes depending on several factors, usually grind size, brewing time, amount of water used and quantity of coffee used.
Many people think they have to boil the water first, but this isn’t true. Once you get your stove or burner set to medium-high heat, if you wait 12-17 seconds before placing the pot on top (depending on your stove), you will not need to reboil the water in order for it to brew properly.
The reason we suggest waiting 12-17 seconds is because different stoves and pots can differ in heat conductivity and intensity. For example, an electric stove will take much longer to heat up compared to a gas stove. But if you end up waiting 17 seconds before adding the pot on top, and find that it is too hot, then simply wait a few more seconds next time or adjust your heating element.
With these tips in mind, let’s now look at how long does it take for a Moka Pot to brew properly:
Brewing Time: Three minutes : Although three minutes doesn’t seem like a lot of time, this brewing method tends to be harsher than the others because the grounds are fully immersed in water throughout its entire brewing process. This can also lead to over-extraction and bitterness as well as off-flavors such as sulphur or metallic.
Brewing Time: Four minutes : This is the standard brewing time for most people who are just getting started with a Moka Pot, although there is no hard and fast rule of thumb. Brewing for four minutes will give you a smoother cup of coffee compared to using the three-minute method, but it still may have some off-flavors.
Brewing Time: Five to seven minutes : This is the ideal range for where your Moka Pot will begin giving you that perfect balance of flavor, body, sweetness and acidity that many coffee lovers desire. You will also get all of the health benefits that are associated with drinking coffee without any bitterness or burnt flavors.
The thing about brewing time on a Moka Pot is that it all depends on the quality of your ingredients. The best way to get a good idea how long you need to brew your coffee is just experimenting with different values until you find what works for you. Here’s a general rule of thumb if you can’t see yourself tinkering with your Moka Pot any time soon:
Ideally, when using fresh whole beans, coarsely ground and cold filtered water, set the timer for five minutes. As your Moka Pot begins to build up pressure in its chamber, remove it from the heat source about three seconds before it has finished brewing. This will preserve the crema that forms at the top while preventing over-extraction, bitterness or off-flavors coming from the exposed grounds.
How To Make A Coffee Using Aeropress?
What you need to make your Aeropress coffee is the following:
-Water (1-4 cups, depending on how much coffee you would like);
-Freshly ground Coffee;
-Aeropress;
-A coffee mug;
Make sure that all of these are cleaned and ready before starting. You will want to be relaxed when making your perfect cup of AeroPress, so it is important to be organised. Another thing that you will need for this process is a kettle with boiling water, so if you lack one I recommend purchasing one! The first step in the process of making an AeroPress drink is weighing out your required amount of coffee into the plunger. Once done, the plunger to the side, and fill the chamber with water from your kettle. Remember to leave room for expansion, especially if you use a 4 cup AeroPress! It is important to remember that in order to get the most out of your coffee beans, it is recommended that you grind them before putting them in with the water. This way, all of their flavours will be released when they are being brewed.
Now, it’s time to add your Aeropress into a warm mug or cup. One method I have used when making my drinks with this product is to put the plunger on top of my mug when I have finished adding my ground coffee. This way it keeps my kitchen tidy when I start brewing! When you feel ready, pour the hot water and coffee mixture into the chamber of your Aeropress.
Once you have poured this in, you should put the plunger on top of it, and then wait for approximately 1 minute before pressing down to filter out all the caffeine! The only thing left to do now is drink up that fantastic cup of coffee, enjoy!
>>> See more: Coffee Brewing Methods: French Press vs Pour Over vs AeroPress and more! – AeroPress vs Moka Pot
Conclusion
The AeroPress and Moka Pot are both amazing devices that can help you get a great cup of coffee. Depending on your preferences, one may be better suited for you than the other. If you like to drink espresso-style coffees but don’t want an expensive machine or something too fancy, then the cheaper Moka Pot might be perfect for you! For those who enjoy filter style cups of joe with less acidity and more body than what’s found in drip machines, we recommend trying out the Aeropress – it’ll also save money because there is no need for paper filters so this method will last longer.
The AeroPress vs Moka Pot debate is one that has been going on for years, but with so many opinions and mixed reviews it can be hard to know what the truth really is. To provide you with some clarity in this coffee brewing battle royale, we’ve put together an unbiased comparison of both coffeemakers to help you decide which will work best for your needs. Which type of brew do you prefer? Let us know in the comments below!
You may like this: Breville Infuser vs Barista Express: Which is Better to Buy?


